Storing Local State in React with apollo-link-state
April 23, 2018 • 8 min read
GraphQL and its ecosystem are awesome and Apollo makes using it a pleasure. If you are writing a javascript application today I can’t stress enough how much simpler these two technologies will make that process.
Apollo has recently moved away from Redux and released there own mechanism to help you store local state in their cache. I’m really excited about this move and believe that this will further simplify the process of frontend development. However it does add complexity in the fact that there not many resources or third party library support out there for apollo-link-state yet. This tutorial aims to help change that. 😀
By the end of this tutorial you will have:
- Setup a React project using
create-react-app - Used
apollo-link-stateto store and query for information - Written some stateless components with help from
recompose
Special thanks to Peggy Rayzis and the Apollo team for all the awesome work and communication that has been going out around this product.
See her Future of State Management post to see what initially brought we over to this technology
Getting Setup
Before you start
Please make sure you have the following installed and/or ready to go:
- Node
- Npm
- Yarn
Initialize the project
First before we can dive into Apollo we need a React App to use it with so lets create a React project called link_state_demo using create-react-app.
# Download Create React App
yarn global add create-react-app

# Use it to create a React Project
create-react-app link_state_demo

# Navigate to the project
cd link_state_demo
Add Additional Dependencies
Next we want to add apollo, apollo-link-state, recompose and lodash among other supporting libraries.
yarn add apollo-boost apollo-client-preset apollo-link-state react-apollo graphql-tag graphql lodash recomposeKick it off!
It’s that simple, now we can just start our dev server and go!
yarn startYou should now be able to navigate to _localhost:3000_ and see your application running.

Modify App.js to be Stateless
Optional!
I prefer to write my components using React’s stateless components because I believe It helps to simplify my code by:
- Reducing boilerplate
- Increasing Readability
- Discouraging lifecycle methods
- Encouraging a healthy separation between UI and Application Logic
Though these are opinions and not required for using this demo!
To change over to using stateless components is as easy as copying the code below to your app.js file:
// app.js
import React from 'react';

import logo from './logo.svg';
import './App.css';

const Header = () => (
  <header className="App-header">
    <img src={logo} className="App-logo" alt="logo" />
    <h1 className="App-title">Apollo Link State Demo</h1>
  </header>);

const App = () => (
  <div className="App">
    <Header/>
  </div>
);

export default App;
Setup the Apollo Client
To begin we will have to set up our Apollo client. This is fairly simple and will involve the modification of one existing file and the creation on another.
Setup the ApolloProvider
Open index.js and wrap <App/> in Apollo’s ApolloProvider.
// index.js
import React from 'react';
import ReactDOM from 'react-dom';
import './index.css';

import App from './App';
import registerServiceWorker from './registerServiceWorker';
import {ApolloProvider} from 'react-apollo';
import {Client} from './Client';

const Root = () => (
  <ApolloProvider  client={Client}>
    <App />
  </ApolloProvider>);

ReactDOM.render(<Root />, document.getElementById('root'));
registerServiceWorker();
Setup the ApolloClient
Create a new file named Client.js and initialize the cache and the ApolloClient
// Client.js
import {InMemoryCache} from 'apollo-cache-inmemory';
import {ApolloLink} from 'apollo-client-preset';
import {ApolloClient} from 'apollo-client';

// Set up Cache
const cache = new InMemoryCache();

// Initialize the Apollo Client
const Client = new ApolloClient({
  link: ApolloLink.from([]),
  cache: cache,
});

export {Client};
Setup State logic that will support a To-Do List
(A To-Do List Demo! How Original!)
Now that we have the Apollo Client setup it’s time to begin adding the methods, queries and components that will allow us store and modify local state in the Apollo Cache.
Add apollo-link-state to Client.js
Below you’ll find an updated Client.js which fully implements all the necessary tools to use apollo-link-state to handle Todo list state. However before you dive into it you should understand what the sections do:
Defaults
The default values that our local cache falls back to when the application loads.
GraphQL
This section houses the GraphQL queries which are used in the following ways:
- Finding data from the cache
- Finding where to insert data into the cache
There are a few differences to pay attention to:
The **_@client_** decorator
This is what tells Apollo that these queries target the local cache.
Query vs Mutation
The query keyword in the @client context does exactly what you expect, it looks for the data in the cache and returns it.
However the mutation keyword tells us that it needs to modify something in the cache. To do this the mutation looks for an identically named function in the resolvers object we pass into CreateClientStore which we define further down.
Cache Mutations
These are the functions that are called by our mutation queries. They are given the parameters sent to the query and an instance of the cache with the intention that we use these to update the state held inside.
Store
This is where we tie together our cache, client state, defaults, resolvers and the Apollo Client to give the ApolloProvider the ability to store state using apollo-link-state.
Helpers
Here we’ve created a Higher Order Component to help give a child component access to the functions needed to interact with the state mechanism we’ve just setup.
What this all looks like
// Client.js
import {InMemoryCache} from 'apollo-cache-inmemory';
import {ApolloLink} from 'apollo-client-preset';
import {ApolloClient} from 'apollo-client';
import {withClientState} from 'apollo-link-state';
import gql from 'graphql-tag';
import {graphql} from 'react-apollo';
import compose from 'recompose/compose';

/*
  Defaults
*/

const todoDefaults = {
  currentTodos: [],
};

/*
  GraphQL
*/

const todoQuery = gql`
  query GetTodo {
    currentTodos @client
  }
`;

const clearTodoQuery = gql`
  mutation clearTodo {
    clearTodo @client
  }
`;

const addTodoQuery = gql`
  mutation addTodo($item: String) {
    addTodo(item: $item) @client
  }
`;

/*
  Cache Mutations
*/

const addTodo = (_obj, {item}, {cache}) => {
  const query = todoQuery;
  // Read the todo's from the cache
  const {currentTodos} = cache.readQuery({query});

  // Add the item to the current todos
  const updatedTodos = currentTodos.concat(item);

  // Update the cached todos
  cache.writeQuery({query, data: {currentTodos: updatedTodos}});

  return null;
};

const clearTodo = (_obj, _args, {cache}) => {
  cache.writeQuery({query: todoQuery, data: todoDefaults});
  return null;
};

/*
  Store
*/

// Set up Cache
const cache = new InMemoryCache();

// Set up Local State
const stateLink = withClientState({
  cache,
  defaults: todoDefaults,
  resolvers: {
    Mutation: {
      addTodo,
      clearTodo,
    },
  },
});

// Initialize the Apollo Client
const Client = new ApolloClient({
  link: ApolloLink.from([
    stateLink,
  ]),
  cache: cache,
});

/*
  Helpers
*/

const todoQueryHandler = {
  props: ({ownProps, data: {currentTodos = []}}) => ({
    ...ownProps,
    currentTodos,
  }),
};

const withTodo = compose(
  graphql(todoQuery, todoQueryHandler),
  graphql(addTodoQuery, {name: 'addTodoMutation'}),
  graphql(clearTodoQuery, {name: 'clearTodoMutation'}),
);

export {
  Client,
  withTodo
}
Setup the TodoList Component
Next we need to actually use the queries we defined above. To do this we are going to create a basic To Do List that lets us add items to a list and clear the list.
Create TodoList.js
// TodoList.js
import React from 'react';
import compose from 'recompose/compose';
import withState from 'recompose/withState';

import {withTodo} from './Client'

const TodoListPure =({
  currentTodos,
  addTodoMutation,
  clearTodoMutation,
  todoText,
  setTodoText,
}) => (
  <div>
    <h1>Todos</h1>
    {currentTodos.map((todo, index) => <div key={index}>{todo}</div>)}
    <input
      value={todoText}
      onChange={(e) => setTodoText(e.target.value)}
      type='text'
      placeholder='Pick up milk, Grab, cheese, etc'
    />
    <input type='submit' value='Add' onClick={(e) => {
      addTodoMutation({variables: {item: todoText}});
      setTodoText("")
    }} />
    <input type='submit' value='Clear All' onClick={(e) => clearTodoMutation()} />
  </div>);

const TodoList = compose(
  withTodo,
  withState('todoText', 'setTodoText', ''),
)(TodoListPure);

export default TodoList;
Add TodoList to our App
We then just need to add the TodoList to our App container and it should be good to go.
import React from 'react';

import TodoList from './TodoList'

import logo from './logo.svg';
import './App.css';

const Header = () => (
  <header className="App-header">
    <img src={logo} className="App-logo" alt="logo" />
    <h1 className="App-title">Apollo Link State Demo</h1>
  </header>);

const App = () => (
  <div className="App">
    <Header/>
    <TodoList/>
  </div>
);

export default App;
What it should look like
Navigating back to localhost:3000 you should see:
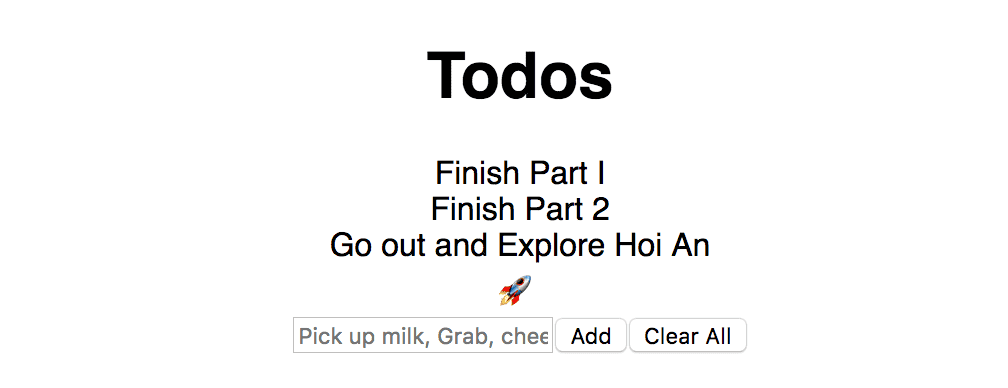
And thats it! You’re now storing state locally using apollo-link-state

Wrap up
Simple solutions and simple architectures lead to a better and more stable systems in the long run. While GraphQL has helped to simplify query logic the Apollo Team has been doing an equal amount of work to simplify the rest. Because of this I’m happy to include these two technologies where ever I can.
In this specific case apollo-link-state has proved to be a valid alternative to Redux and has saved me from:
- Adding another technology and paradigm
- Splitting my state into multiple locations
- Adding more that one method to get application state.
The only caveat so far is that Link State lacks some tooling and third party library support that the Redux community enjoys, but I believe that is a very small and very temporary issue.
Coming up next
We dive into how to set up apollo-link-state for success when handling Nadditional stores.
Setting up apollo-link-state for Multiple Stores
🧞 This is open source! you can find it here on Github
❤️ I only write about programming and remote work. If you follow me on Twitter I won’t waste your time.